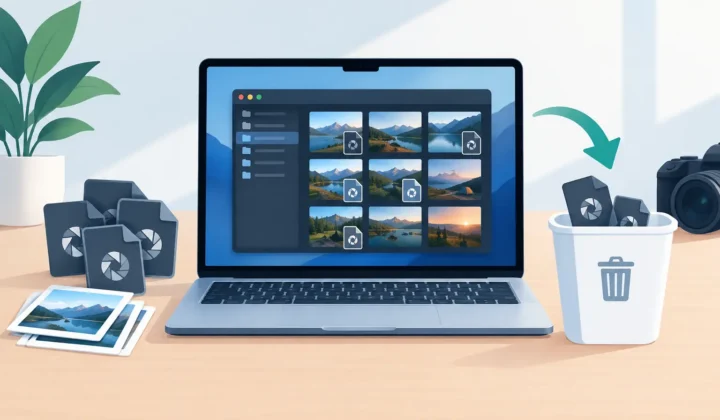
How to Restore Deleted RAW Photos Safely

A deleted RAW file is not always gone. On an Apple device, it may still be in Recently Deleted with its place in your Photos library intact. On a camera card or external drive, recovery may still be possible – but every new photo, file transfer, or repair attempt can reduce the odds.
The first rule to restore deleted RAW photos is simple: stop writing to the device that held them. Do not keep shooting on the card. Do not import more files to the same drive. Do not install recovery software onto the affected disk. Preserve what remains before you attempt a fix.
Start with Recently Deleted in Photos
If you deleted a RAW image from Apple Photos on iPhone, iPad, or Mac, check Recently Deleted before doing anything else. Photos keeps deleted items there for up to 30 days unless you remove them permanently.
On iPhone or iPad, open Photos, go to Collections, then scroll to Utilities and open Recently Deleted. Authenticate with Face ID, Touch ID, or your passcode, select the image, and choose Recover. On Mac, open Photos, select Recently Deleted in the sidebar, choose the photo, and click Recover.
This is the safest recovery path because it is native to Photos. The image should return to your library without a loose-file import process. If it was in an album, marked as a favorite, or associated with an iCloud Photos library, give Photos time to sync before assuming anything is missing.
Check every Apple device signed into iCloud Photos
When iCloud Photos is enabled, deleting a photo on one device normally deletes it everywhere. Recently Deleted also syncs, so a photo removed on your iPhone may be recoverable from your Mac or iPad as long as it is still within the retention window.
Use the same Apple Account and wait for the library to finish syncing. Avoid toggling iCloud Photos off in the middle of a recovery attempt. That can create confusion about whether you are looking at the current library, a local cache, or an incomplete download.
Recover RAW photos from a memory card
A camera memory card is different from a Photos library. When a camera deletes a file, it often marks the card space as available rather than immediately erasing every piece of image data. That creates a recovery window, but it closes as the card is used.
Remove the card from the camera immediately. If it has a physical lock switch, move it to the locked position. Connect it to a Mac using a reliable card reader, preferably one that does not also write extra files to the card.
Recovery software can scan the card for recognized RAW formats, including common files from Canon, Nikon, Sony, Fujifilm, Olympus, Panasonic, and other camera makers. Save recovered files to a different disk, never back to the original card. Writing recovered data to the card can overwrite another image that has not yet been found.
A few results are possible. You may recover the original filename and folder structure. You may recover a valid RAW image with a generic name. Or you may find partial files that preview poorly or will not open. The outcome depends on the camera, card format, fragmentation, and whether new data has already been written.
Do not format the card to “fix” it
A camera that says a card needs formatting can make a stressful situation worse. Formatting may not immediately destroy every RAW file, but it changes the file system and complicates recovery. Take the card out, make a sector-by-sector image if you can, and work from that copy when the images are valuable.
If the card is physically failing, disconnect it after the first signs of read errors, repeated disconnections, or unusually slow access. Repeated scans can put more stress on unstable hardware. For irreplaceable work such as a client shoot, wedding, or once-in-a-lifetime trip, professional data recovery is often the more sensible choice.
Look for copies before using recovery software
Recovery software should not be your first stop when the RAW photos may already exist elsewhere. Check the places where Apple and camera workflows commonly leave copies.
Look in a Time Machine backup if the deleted RAW files lived in a Mac folder or inside an earlier Photos library backup. Check a separate external backup drive, a cloud backup service, or the original camera card if you imported images but never reformatted it. If you use Photos with iCloud Photos, verify that the library is fully synced and inspect Recently Deleted before restoring an older backup that could replace newer library changes.
Also check whether you exported edited versions. An exported JPEG or HEIC will not replace the original RAW file for deep editing, but it may preserve the finished image, crop, color work, and moment that matter most. A usable finished photo is better than losing time chasing a perfect recovery that is no longer possible.
Be careful with deleted RAW files on external drives
External hard drives and SSDs require different expectations. Traditional hard drives can often be good candidates for recovery if you stop using them quickly. Deleted data may remain on the disk until it is overwritten.
SSDs are less predictable because of TRIM. This feature can clear blocks after deletion to keep the drive fast. Once that happens, file recovery may be impossible even if a scan finds an old filename or directory entry. The same risk applies to many modern Macs with internal SSD storage.
If the files were on an external SSD, eject it and do not copy anything else onto it. Search backups first. If you decide to scan it, install the recovery tool on another volume and recover results to another volume. Never use the affected SSD as the destination.
Know what comes back with a recovered RAW file
A recovered RAW file may not bring back every part of your editing workflow. The original sensor data and embedded camera metadata are often contained in the RAW file itself. Ratings, keywords, captions, album placement, and non-destructive adjustments may live in a photo library database, sidecar file, or separate catalog.
In Apple Photos, edits and organization are managed within the Photos library and synchronized through iCloud Photos when enabled. Recovering through Recently Deleted gives you the best chance of returning the item within that familiar context. Recovering a RAW file from a card or disk scan gives you a file, not necessarily its Photos history.
If you find a recovered file, import it into a separate test album first. Confirm that Photos can render it at full size, inspect the image at 100 percent, and verify capture date, location, and orientation. Keep the recovered original untouched while you test. A recovery result that opens once but has corruption in shadow areas or later frames is not a file you want to overwrite your only copy with.
Prevent the next RAW deletion from becoming a recovery job
RAW is worth protecting differently because it is both large and editable. A practical setup uses three layers: your working Photos library, iCloud Photos or another synced copy, and an independent backup such as Time Machine or a separate drive. Camera cards should not be your only archive, but they should not be reformatted until you confirm the import and backup are complete.
Storage pressure is where many accidental deletions begin. When a Photos library becomes too large, it is tempting to delete quickly, export files to random folders, or remove originals without a clear plan. A better approach is to keep the RAW files that still need serious editing and convert finished keepers into a high-efficiency format for everyday access.
For Apple Photos users, RawToHEIC can convert supported RAW files, including iPhone ProRAW, directly in Photos after the editing stage. That keeps the result in the library instead of creating a loose-file workflow, while verified deletion safeguards help you confirm what is being removed. It is not a recovery tool, and that distinction matters: prevention is strongest when it happens before storage pressure leads to a rushed deletion.
When you need to restore deleted RAW photos, move slowly. Check Recently Deleted and backups first, stop all writes to the affected storage, and treat the original device as evidence rather than a workspace. A calm first decision can preserve the photo – and the edits, metadata, and organization around it – far better than any recovery scan.
Shrink your RAW library, right inside Photos.
RawToHEIC converts camera RAW and iPhone ProRAW to HEIC up to 10× smaller — keeping every edit, album, favorite, and location. On-device, no account, one purchase for iPhone, iPad, and Mac.

Not sure yet? Convert a few sample photos free — no install, nothing uploaded.
Try it free — no install →